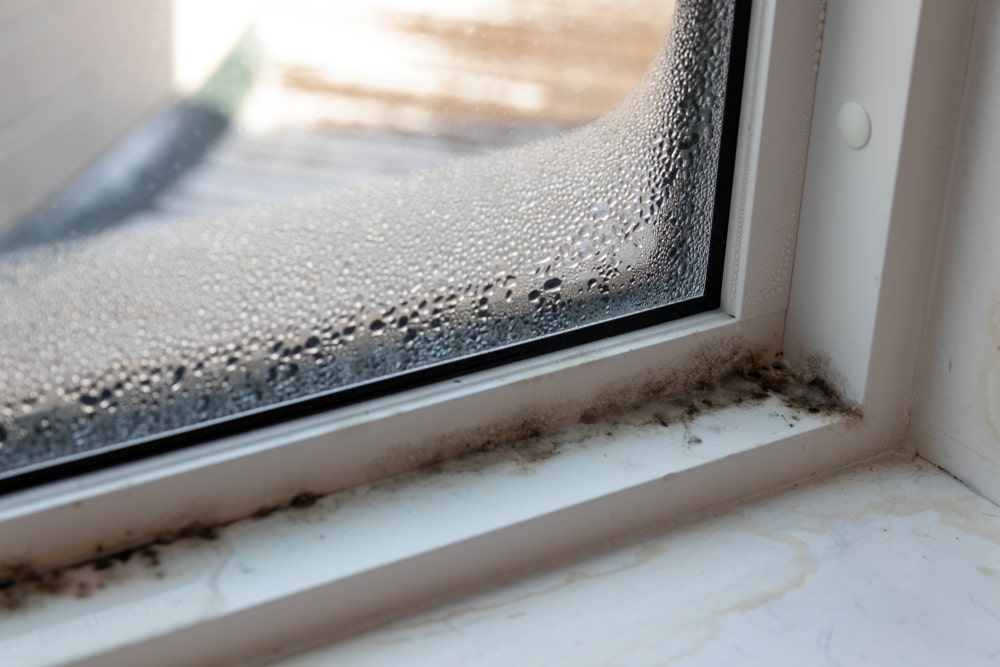
What’s the best way to remove mold from a car’s ventilation system

What’s the best way to remove mold from a car’s ventilation system

If you’ve detected mold in your car’s ventilation system, follow these steps to effectively eliminate mold and musty odor:

  1. Dry Out the Entire Vehicle:
    • Mold thrives in damp environments, so start by ensuring your vehicle is dry and moisture-free.
    • Park your car in direct sunlight with the windows open to aid in drying.
  2. Protective Gear:
    • Wear eye goggles and gloves to safeguard your health during the cleaning process
  3. Spray Disinfectant Through Vents:
    • Locate the intake vents near the windshield.
    • Spray an antibacterial mold cleaning solution into the vents.
    • Turn on the car’s fan and let the cleaner circulate through the HVAC system for at least 10 minutes.
  4. Wipe Down Surfaces:
    • Use a clean cloth to wipe down surfaces within the air intake vent system.
    • Pay attention to hard-to-reach areas.
  5. Replace the Cabin Air Filter:
    • Install a new cabin air filter to maintain clean air circulation.

Remember, acting promptly is crucial to prevent mold regrowth. Avoid running your car’s AC until the mold has been eliminated.

Why Do I Continue to Get Water in My Car?

Why Do I Continue to Get Water in My Car?

Why Do I Continue to Get Water in My Car?

Continued water ingress into your car can be due to several reasons, often involving multiple potential sources and contributing factors. Here are some common reasons why your car might still be getting water inside:

Common Causes of Persistent Water Leaks

  1. Faulty or Worn Seals:
  • Door Seals: Over time, the rubber seals around your doors can become brittle, cracked, or misaligned, allowing water to seep through.
  • Window Seals: Seals around windows can also degrade, leading to leaks during rain or car washes.
  • Trunk Seals: The rubber seal around the trunk can wear out or get damaged, letting water in.
  1. Sunroof Issues:
  • Clogged Drains: Sunroofs have drainage channels that can get clogged with debris, causing water to overflow into the car.
  • Seal Failure: The seal around the sunroof itself can wear out or get damaged.
  1. Windshield and Window Problems:
  • Improper Installation: If the windshield or windows were replaced improperly, they might not be sealed correctly.
  • Cracks and Chips: Small cracks or chips in the windshield can allow water to seep in.
  1. Body Panel Gaps:
  • Misaligned Panels: Body panels that are not properly aligned or have gaps can allow water to enter.
  • Rust and Corrosion: Rust can create holes or gaps in the car body, particularly in older vehicles.
  1. HVAC System Issues:
  • Clogged A/C Drain: The air conditioning system has a drain to remove condensation. If this drain is clogged, water can back up into the car.
  • Heater Core Leak: A leaking heater core can also introduce water into the interior.
  1. Structural Damage:
  • Previous Accidents: If the car has been in an accident, there could be hidden structural damage that compromises its ability to stay watertight.
  • Roof Racks and Accessories: Improperly installed roof racks or other accessories can create entry points for water.
  1. Door Membranes:
  • Damaged Membranes: The plastic membranes inside the doors, designed to keep water out, can get damaged or improperly installed.
  1. Poor Drainage Channels:
  • Blocked Drains: Various drainage channels in the car can become blocked by leaves, dirt, or other debris.
  • Poor Design: Some car models have inherently poor drainage designs that are prone to clogging or inadequate water diversion.

Steps to Diagnose and Fix Persistent Water Leaks

  1. Comprehensive Inspection:
  • Conduct a detailed inspection of all potential entry points, including door and window seals, the sunroof, and body panels.
  • Check for visible signs of wear, damage, or misalignment.
  1. Water Test:
  • Use a hose to systematically spray water on different parts of the car while someone inside observes for leaks. This can help pinpoint the exact location of the ingress.
  1. Interior Check:
  • Lift carpets and inspect the padding and floor for dampness or mold, which can indicate the leak’s location.
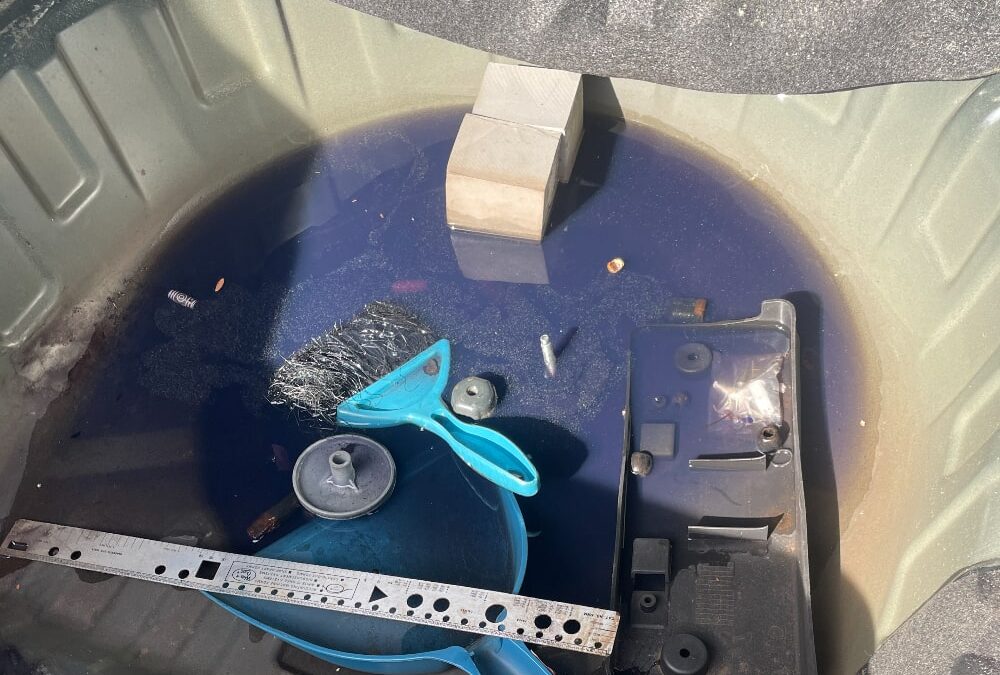
  • Check the trunk and spare tire well for water accumulation.
  1. Professional Tools:
  • Consider using professional tools like smoke machines or UV dyes to detect leaks more accurately.
  1. Maintenance and Repairs:
  • Replace worn or damaged seals around doors, windows, and the trunk.
  • Ensure sunroof drains are clear and functioning properly.
  • Check and clear the A/C drain and inspect the heater core.
  • Realign or repair misaligned body panels and ensure all accessories are properly sealed.

Professional Mold Remediation

Professional car technicians use a variety of methods to find leaks in a car. These methods are designed to be thorough and precise, ensuring that even the smallest leaks are identified and addressed. Here are some of the techniques they commonly use:

Comprehensive Inspection

  • Moisture Source Identification: Professionals identify and address the source of moisture that caused mold growth. This could involve checking seals, weather stripping, HVAC systems, and drainage areas.
  • Extent of Mold Growth: They assess the extent of mold contamination, including areas not visible to the naked eye, such as behind panels, under carpets, and within the HVAC system.

Exterior and Interior Check

  • Seals and Weather Stripping: Inspect all seals around windows, doors, the trunk, and the sunroof for any visible signs of wear, damage, or improper installation.
  • Undercarriage: Check the undercarriage for any rust or corrosion that might indicate water ingress.
  • Interior Carpets and Mats: Look for dampness, stains, or mold on carpets and floor mats.
  • Window and Windshield Seals: Closely inspect the seals around the windshield and windows for cracks or gaps.
  • Broken lap welds from accidents.  When a car is in an accident it often results in seam or lap welds being broken.  Unfortunately, broken welds are often missed by body shops during the repair process.
  • Door Seals: Door seals are designed to keep water out of your car’s interior. However, they can also wear out, become damaged, or come loose, allowing water to enter the cabin. Inspect the door seals for cracks, gaps, or debris that may prevent them from sealing properly. If you find a damaged seal, replace it or use a weatherstripping adhesive to reattach it.
  • Sunroof: Sunroofs are a common source of water leaks in cars, especially if they’re not maintained properly. The sunroof’s drain channels can become clogged with debris, causing water to overflow and enter the vehicle. To address this issue, clean the drain channels and ensure they are free of obstructions. Additionally, check the sunroof seal for any signs of wear or damage.
  • Cowl Area: The cowl area, located at the base of the windshield, is designed to direct water away from the vehicle. However, if the cowl’s drains or the area around them become clogged, water can enter the cabin through the ventilation system. To prevent this, regularly clean the cowl area and ensure the drains are functioning properly.
  • Taillight Gaskets: Taillight gaskets can become damaged or wear out over time, allowing water to seep into the trunk or rear cabin area. If you notice water pooling in your trunk or condensation inside your taillights, inspect the gaskets for damage and replace them if necessary.

Ongoing Preventive Measures:

  • Regularly clean and maintain drainage channels and sunroof drains.
  • Keep the car clean to prevent debris from accumulating and blocking drains.
  • Inspect seals and gaskets periodically for signs of wear and replace them as needed.

Conclusion

Persistent water ingress in a car can be due to a combination of factors, from faulty seals and clogged drains to structural damage and poor drainage design. Identifying the exact cause requires a thorough inspection and sometimes professional diagnostic tools. Regular maintenance and timely repairs are crucial to preventing further water damage and ensuring a dry, comfortable car interior. If you continue to experience water ingress despite your efforts, consulting a professional might be necessary to identify and resolve the issue comprehensively.


What you Should Know About the Impacts of Car Mold on your Pet

What you Should Know About the Impacts of Car Mold on your Pet

Pet hair can play a significant role in contributing to mold growth in cars. Understanding the relationship between pet hair and mold development is crucial for preventing mold issues and maintaining a healthy environment for both you and your pets.

Health Risks of Mold in Cars to Pets-Smaller body sizes and less advanced immune systems make our pets more susceptible to mold-related health issues than us. Even slight exposure to mold can be devastating for your furry friends.

Mold can thrive pretty much anywhere pets like to spend time. Knowing the signs of mold exposure in pets can help you seek appropriate medical attention and avert life-threatening situations.

Mold in cars can have several adverse effects on pets. Just like humans, pets are susceptible to mold exposure and can experience a range of health issues.

Dogs love to eat whatever they can find, even if it comes out of the trash. And while most times they are fine, ingesting moldy food is a whole other beast. Some of the symptoms to look out for include reduced appetite, stool changes, and vomiting. You might notice tremors and seizures if your pet ingests a lot of moldy food.

Here are some key points to consider:

How Pet Hair Contributes to Mold Growth in Cars

Moisture Retention

Moisture Trapping:

  • Absorbent Nature: Pet hair can trap and hold moisture, especially if it’s damp from a rainy day, a trip to the lake, or a recent bath. This retained moisture can create a conducive environment for mold spores to thrive.
  • Humidity: The presence of pet hair in a confined space like a car can increase the humidity levels, further promoting mold growth.

Organic Material

Nutrient Source:

  • Organic Debris: Pet hair, along with dander and skin flakes, provides a rich source of organic material that mold spores can feed on. This organic matter can accumulate in hard-to-reach areas of the car, such as under seats and in ventilation systems.
  • Growth Medium: The combination of moisture and organic material from pet hair creates an ideal growth medium for mold.

Airflow Obstruction

Ventilation Issues:

  • Clogged Vents: Pet hair can obstruct car ventilation systems and filters, reducing airflow and creating pockets of stagnant air where mold can flourish.
  • Air Quality: Poor ventilation and reduced air circulation can increase humidity levels and the likelihood of mold growth.

Moisture Control

Drying Techniques:

  • Air Drying: After your pet has been in the car, especially if they were wet or damp, leave the windows slightly open (if safe) or run the air conditioning to dry out the interior.
  • Dehumidifiers: Use portable dehumidifiers or moisture absorbers to keep the car interior dry. Silica gel packs or activated charcoal can help absorb excess moisture.

Pet Preparation

Grooming:

  • Regular Grooming: Keep your pet well-groomed to reduce shedding. Brush your pet frequently to remove loose hair and dander before they enter the car.
  • Bathing: Bathe your pet regularly to reduce the amount of hair and dander they shed.

Protective Covers:

  • Seat Covers: Use removable, washable seat covers to protect your car’s upholstery. Choose covers that are easy to clean and designed to trap pet hair.
  • Cargo Liners: If you transport your pet in the trunk or cargo area, use cargo liners that can be easily removed and cleaned.

Regular Cleaning and Maintenance

  • Interior Maintenance: Regularly clean the car’s interior, including seats, carpets, and mats, and air vents to prevent mold growth.
  • Wiping Surfaces: Use a damp cloth or pet hair remover tools to wipe down seats, floors, and other surfaces to ensure no hair is left behind.
  • Vacuum Frequently: Use a vacuum with a HEPA filter to remove mold spores from the car’s upholstery and flooring. Regularly vacuum your car’s interior to remove pet hair, dander, and other debris. Use attachments to reach under seats, in crevices, and other hard-to-reach areas.
  • Use Mold-Resistant Products: Opt for mold-resistant seat covers and floor mats.
  • Anti-Mold Sprays: Apply pet-safe anti-mold sprays to the car’s interior surfaces to disinfect surfaces and prevent future growth.
  • Shampooing: Periodically shampoo fabric seats and carpets to remove any embedded pet hair and dander. Make sure to dry the upholstery thoroughly to prevent moisture buildup.
  • Dry Wet Areas: Immediately dry any wet areas in the car to prevent moisture buildup.
  • Leather Conditioning: If your car has leather seats, clean and condition them regularly to remove hair and maintain their integrity.

Remediation of Mold in Cars

  • Deep Cleaning: If mold is detected, a thorough cleaning of the affected areas is necessary. This might involve removing and cleaning seats, carpets, and other components.
  • Check for Leaks: Regularly inspect the car for any leaks, particularly around windows, doors, and the sunroof, and repair them promptly.
  • Monitor Humidity Levels: Use a hygrometer to monitor the humidity levels inside the car and keep them below 50%.
  • Moisture Control: Ensure the car is kept dry by fixing any leaks
  • Filter Replacement: Regularly check and replace your car’s cabin air filter. Consider using filters designed to trap pet hair and dander.
  • Vent Cleaning: Clean the air vents and ducts to ensure proper airflow and reduce the likelihood of mold growth in the ventilation system.
  • Ensure Proper Ventilation: Consider using portable air purifiers/dehumidifiers designed for cars to reduce airborne mold spores and to maintain a dry environment.
  • Silica Gel Packs: Place silica gel packs or activated charcoal bags in the car to absorb excess moisture.
  • Ventilate the Car: Regularly ventilate the car by opening windows and doors to allow fresh air to circulate. and reduce humidity levels.

Safe Transport

  • Remove Mold Source: Clean and remove the mold from your car to prevent further exposure. Ensure your car is dry and mold-free before allowing your pet back inside.
  • Regular Inspections: Regularly inspect the car for signs of mold, especially if you frequently transport pets.
  • Use Pet Carriers: Keep pets in carriers or designated pet seats that are easy to clean and maintain.

Professional Mold Remediation

  • Specialized Services: For extensive mold issues, consider hiring a professional mold remediation service. They have the tools and expertise to safely and effectively remove mold from your car
  • Inspection: If you suspect mold growth due to pet hair, have a professional inspect your car. They can identify hidden mold and provide recommendations for remediation.
  • Testing: Professionals can conduct air quality tests to determine the extent of mold contamination.
  • Routine Check-Ups: Have regular professional inspections to ensure the car remains mold-free, especially if you live in a humid climate.

Symptoms of Mold Exposure in Pets

Respiratory Issues

Symptoms:

  • Allergic Reactions: Pets can develop allergic reactions to mold spores, leading to symptoms such as persistent coughing, wheezing and labored breathing due to mold spores irritating their respiratory system.
  • Asthma and Bronchitis: Prolonged exposure to mold can exacerbate asthma and bronchitis in pets, especially in those with pre-existing respiratory conditions.
  • Sneezing and Nasal Discharge: Constant sneezing and nasal discharge are common symptoms of respiratory distress caused by mold.
  • Pneumonia: In severe cases, mold exposure can lead to pneumonia, a serious lung infection requiring immediate veterinary attention.

Allergic Reactions

Symptoms:

  • Dermatitis: Persistent exposure to mold can cause dermatitis, a chronic skin condition characterized by inflamed, itchy, sore skin, allergic dermatitis, and swelling can occur, particularly around the eyes, ears, and paws.
  • Skin Irritation: resulting in itching, redness, and inflammation. Pets may scratch or bite their skin excessively, leading to secondary infections due to allergic reactions to mold spores.
  • Ear Infections: Mold spores can lead to recurring ear infections, especially in pets with floppy ears where moisture can easily get trapped.

Gastrointestinal Issues

Symptoms:

  • Vomiting and Diarrhea: Pets may ingest mold spores by licking contaminated surfaces or grooming themselves after being in a moldy environment. This can lead to gastrointestinal issues such as vomiting, diarrhea, and loss of appetite.

Neurological Symptoms

Symptoms and Behavioral Changes:

  • Lethargy and Depression: Pets may become unusually lethargic, depressed, or show signs of disorientation, and increased grooming
  • Weakened Immune Response: Chronic mold exposure can weaken the immune system, making pets more susceptible to infections and other illnesses.
  • Toxic Mold Exposure: Certain types of molds produce mycotoxins, which can be harmful if ingested or inhaled. In severe cases, mold toxins can affect the nervous system. Symptoms of mycotoxin exposure include tremors, seizures, and changes in behavior or coordination.

Immune System Suppression

Symptoms:

  • Increased Susceptibility to Infections: Pets exposed to mold may become more prone to other infections due to a weakened immune system.

Long-Term Effects

  • Weight Loss: Chronic gastrointestinal issues can lead to significant weight loss and malnutrition.

Veterinary Care:

Treating Symptoms of Mold Exposure in Pets

  • You need to see a vet immediately if you notice symptoms of mold exposure in your cat or dog. Arranging for your pet to stay with a friend prevents continued exposure and ensures that the symptoms don’t worsen. The vet will most likely prescribe medication to treat the symptoms. You may also be asked to isolate your pet from other pets. 
  • Monitor Health: Keep a close watch on your pet’s health and report any new symptoms to your vet.
  • By taking these preventive steps, you can safeguard your pets’ health and well-being.

Conclusion

Pet hair can significantly contribute to mold growth in cars by trapping moisture, providing organic material, and obstructing airflow. Regular cleaning, moisture control, proper ventilation, and grooming of your pets are essential steps to prevent mold issues. If mold growth occurs, prompt inspection and remediation are necessary to maintain a healthy environment for both you and your pets.

Mold in cars can pose serious health risks to pets, causing respiratory issues, allergic reactions, neurological effects, gastrointestinal distress, neurological symptoms and immune system suppression.

To protect your pets, it is essential to maintain a clean and dry car environment, use preventive measures like moisture control and proper ventilation, and seek professional help if mold is detected.

Regular veterinary check-ups and prompt medical attention can help mitigate the risks associated with mold exposure in pets.

Properly Storing a Vehicle to Prevent Moisture and Mold Growth

Properly Storing a Vehicle to Prevent Moisture and Mold Growth

Properly Storing a Vehicle to Prevent Moisture and Mold Growth

Properly storing a vehicle to prevent moisture and mold growth is crucial for maintaining its condition and ensuring it remains in optimal shape during periods of inactivity. Whether you’re storing your car for a few weeks or several months, following the right procedures can prevent costly damage and preserve its value

To prevent mold growth in a car whilst it is being stored, ensure that it is deeply cleaned, and the interior of the vehicle is as dry as possible. Deeply cleaning the vehicle will remove sources of nutrients mold can feed off and keeping it dry will deny mold the moisture it needs to live.

Storing a vehicle to prevent mold involves a combination of proper preparation, environmental control, and maintenance practices.

Maintaining a clean, dry, and well-ventilated environment is key to preventing mold and ensuring your vehicle remains in good condition during storage.

Clean the Vehicle Thoroughly

Clean the Interior

  • Any organic matter left in the car, over time, has the chance to become food for mold and bacteria. The better a job you can do of making sure it is as clean as possible before being stored, the less likelihood there is of having any unwanted surprises when you open, the door in a few months’ time.
  • Thoroughly clean the car’s interior to remove any trash, dirt, food crumbs, and other organic material that can attract moisture and mold. Remove all items from the car, especially those that can trap moisture or attract pests, such as food wrappers, clothes, or papers.
  • Vacuum the entire interior, floor mats, lifting carpets, moving seats, and getting into any difficult-to-reach places.
  • Condition the Leather and Upholstery: Use appropriate conditioners for leather seats and upholstery to keep them in good condition and prevent mold growth.
  • Spray Mold Inhibitors: Use mold-inhibiting sprays on carpets, seats, and other interior surfaces. These sprays can prevent mold growth by creating an inhospitable environment for mold spores.
  • Antimicrobial Treatments: Consider professional antimicrobial treatments for the interior, which can provide long-term protection against mold and mildew.

How Dust and Dirt Contribute to Mold Growth

  • Moisture Retention: Dust and dirt can absorb and retain moisture. When combined with humid conditions, this moisture can create an environment conducive to mold growth.
  • Nutrient Source: Dust and dirt often contain organic matter, such as pollen, dead skin cells, and other debris, which can provide nutrients for mold spores to thrive.
  • Surface Coverage: A layer of dust and dirt on surfaces can trap moisture underneath, creating a micro-environment where mold can grow unnoticed.
  • Air Quality: Poor air circulation in a dusty and dirty environment can lead to stagnant air, which increases humidity levels and the likelihood of mold development.

Dry the Interior

  • Remove Moisture-Ensure that the interior is completely dry before storage. Use a moisture absorber if necessary. Any moisture left inside can lead to mold growth.
  • Run the air conditioning system on the “max cool” setting for several minutes to dehumidify the air inside the car.
  • A car or vehicle doesn’t have to be “wet” to have a high enough moisture level for mold to grow. In fact, as long as the humidity level stays over 55%, mold can begin to establish itself in only 24-48 hours!
  • It is therefore advised that you keep the interior of your vehicle as dry as possible, both before and whilst in storage.
  • Any obvious signs of moisture, such as water on the surface from rain, can be dried with a cloth, and the same goes for any internal damp patches.
  • To keep the vehicle’s overall humidity as low as possible, consider leaving boxes of opened baking powder or activated charcoal throughout. These will not only help to absorb moisture but will also deodorize, eliminating any unpleasant smells.

Desiccants

  • Place desiccants (silica gel packs) or moisture absorbers (such as DampRid) inside the vehicle to absorb any excess moisture and control humidity.
  • Distribute them evenly throughout the car, including under the seats and in the trunk. These can help absorb excess moisture from the air.

Ventilation

  • Ensure the car is well-ventilated. Leave the windows slightly open to allow air circulation, but only if the storage environment is secure and dry. This helps prevent the buildup of moisture.
  • Consider using a portable dehumidifier or running the air conditioning on high for a while to remove any residual moisture.

Exterior Cleaning

Wash and Wax:

  • Begin by washing your car thoroughly to remove all dirt, grime, and road salts. This helps protect the paint and clear any dirt or debris that might contribute to mold growth.
  • Apply a high-quality wax to create a protective barrier on the paint, which can help repel moisture.

Check for Leaks and Maintain Seals

  • Inspect seals and repair any leaks in the windows, doors, sunroof, and trunk for any signs of wear or damage. Replace any damaged seals to prevent water ingress.
  • Sunroof Drains: Ensure the sunroof drains are clear and functioning properly. Clogged drains can cause water to overflow into the car’s interior.
  • Lubrication: Applying silicone-based lubricants to maintain the flexibility and effectiveness of the seals.

Additional Precautions

Remove Fabrics

  • Remove any items that can absorb moisture, such as floor mats, seat covers, and carpets, if storing the car for an extended period.

Battery Maintenance

  • Disconnect the battery or use a trickle charger to keep it charged without running the risk of electrical problems, which can sometimes cause dampness.

Fuel Stabilizer

  • Add a fuel stabilizer to the gas tank to prevent the fuel from breaking down and potentially attracting moisture.

Control the Storage Environment

Choose a Dry Location

  • If using a company to store your vehicle, you should conduct a thorough inspection of the location to ensure there are no obvious signs of damp or moisture, the location is clean and there is preferably a source of natural sunlight.
  • Use a dehumidifier in the storage area if possible.
  • Ventilation-Ensure proper ventilation to avoid stagnant air. You can slightly crack the windows if the storage environment is secure and free of pests.
  • Store the vehicle in a dry, well-ventilated garage or storage unit that is dry and has good air circulation. Avoid damp areas that are prone to humidity or flooding.
  • Baking Soda: Place a box of baking soda in the interior and trunk area. Baking soda naturally absorbs moisture and odors.
  • Use a dehumidifier in the storage area if possible.
  • Use a Hygrometer-Place a hygrometer in the storage area to monitor humidity levels. Aim to keep humidity below 60% to discourage mold growth.
  • If possible, use a climate-controlled storage unit to maintain a consistent, dry environment, this also maintains a stable temperature and humidity level.

Use a Car Cover

  • Invest in a high-quality, breathable custom-fit cover. It should extend down over the wheel wells and have straps to secure it tightly. Otherwise, wind can whip the cover against your car, leaving the paint looking like it was sandblasted.
  • Avoid plastic covers, as they can trap moisture underneath and create a perfect breeding ground for mold. A breathable cover allows moisture to escape while protecting the car from dust and debris that can act as a source of nutrients for mold.
  • Ensure the cover is fully waterproof to prevent green molds and algae’s growing on the rubber seals of your vehicle.

Underbody Protection

  • If storing the car outdoors, consider placing a tarp or moisture barrier under the vehicle to prevent moisture from the ground affecting the underside of the car.

Regularly Check on the Vehicle

  • Periodically check the vehicle during storage to ensure there are no signs of moisture or mold.
  • Check under the seats, in the trunk, and around the windows and doors.
  • If you notice any condensation or dampness, take steps to dry the interior immediately.
  • Air Fresheners-Use air fresheners or odor absorbers designed to combat musty smells and mold.
  • Periodic Ventilation-If possible, periodically open the car doors and windows to allow fresh air to circulate inside the vehicle.
  • Run the Engine-Start the engine and run it for a few minutes every couple of weeks to keep the engine parts lubricated and the ventilation system functioning reducing the chances of mold growth in the HVAC system.

Why do cars get moldy in storage?

  • High moisture levels within the vehicle itself
  • Food or organic material being left in the vehicle
  • High moisture levels in the room the vehicle is being stored in
  • The car was stored in a temperate climate between 60-80 degrees Fahrenheit

Conclusion

Properly preparing your car for storage is crucial in preventing moisture and mold damage. By thoroughly cleaning and drying the vehicle, controlling the climate, ensuring proper ventilation, using protective covers, maintaining the battery, regularly inspecting the car, and preventing pests, you can keep your car in pristine condition while it’s stored. These steps will help ensure that your vehicle remains mold-free and ready to use when you need it again.

A professional inspection and preparation service can effectively prevent mold issues during long-term car storage by addressing all aspects of cleanliness, moisture control, and environmental management. By thoroughly cleaning the car, managing moisture levels, inspecting and maintaining seals, and ensuring the storage environment is suitable, professionals can help keep your car mold-free and in excellent condition throughout its storage period.

Can there be mold in the car that I can’t see?

Can there be mold in the car that I can’t see?

Can there be mold in the car that I can’t see?

Yes, mold can grow in areas of your car that are not immediately visible. Mold tends to thrive in dark, damp, and poorly ventilated spaces, which can exist in various hidden parts of a vehicle.

Pets and kids can inadvertently create conditions that promote the growth of hidden mold in cars. Understanding how this happens can help you take proactive measures to prevent mold issues.

Hidden Areas Prone to Mold Growth

Under the Carpets and Floor Mats:

    • Moisture Accumulation: Water can seep under the carpets and floor mats from wet shoes, spills, or leaks, creating a perfect environment for mold.
    • Condensation: Humidity and condensation can also cause moisture to accumulate in these areas.
    • Inside the HVAC System:
    • Air Ducts and Vents: Mold can grow inside the car’s heating, ventilation, and air conditioning (HVAC) system, particularly in the ducts and vents where moisture can accumulate.
    • Evaporator Coil: The evaporator coil can become a breeding ground for mold due to condensation.
    • Under Seats and in Seat Cushions:
    • Absorbed Moisture: Seats, especially fabric ones, can absorb moisture and, if not dried properly, can develop mold within the cushions or under the seats.
    • Spills and Leaks: Spilled liquids or leaks from windows or the sunroof can lead to mold growth in these areas.
    • In the Trunk:
    • Trapped Moisture: The trunk is another area where moisture can become trapped, especially if the trunk seal is damaged or if wet items are stored there.
    • Condensation: Similar to the interior cabin, humidity and condensation can lead to mold growth.
    • Behind Panels and Linings.
    • Door Panels: Moisture can get trapped behind door panels, especially if the weatherstripping is compromised.
    • Roof Lining: The roof lining can also harbor mold if there are leaks from the sunroof or if the vehicle has been exposed to excessive moisture.

How Pets and Kids Contribute to Hidden Mold in Cars

     Increased Moisture Levels

  • Spills and Accidents: Children often spill drinks and snacks, and pets can have accidents in the car. These spills, if not cleaned promptly and thoroughly, can seep into the carpets and upholstery, creating a damp environment conducive to mold growth.
  • Wet Items: Wet clothes, shoes, pet blankets, or towels can introduce moisture into the car. Pets can also bring in moisture after a walk in the rain or playing in water, while kids might bring in wet items from sports activities or rainy weather.

Organic Material

  • Food Crumbs and Debris: Kids often leave behind crumbs and food wrappers, while pets can shed fur and dander. These organic materials can serve as a food source for mold, encouraging its growth.
  • Pet Hair and Dander: Pet hair can trap moisture and provide a surface for mold spores to attach to. Dander, the microscopic skin flakes pets shed, can also contribute to mold proliferation.

Poor Ventilation

  • Closed Windows: For safety reasons, windows are often kept closed when kids and pets are in the car, which can reduce ventilation and increase humidity levels inside the vehicle.
  • Infrequent Cleaning: Cars with frequent pet and kid passengers might not be cleaned as often or as thoroughly as needed, allowing mold-friendly conditions to develop.

Signs of Hidden Mold

  1. Musty Odor:
  • A persistent musty or moldy smell in the car, even if you can’t see any mold, is a strong indicator of hidden mold growth.
  1. Allergic Reactions:
  • Experiencing allergic reactions such as sneezing, coughing, itchy eyes, or respiratory issues when inside the car can indicate the presence of mold.
  1. Condensation:
  • Excessive condensation on windows, especially when the car has not been used, can be a sign of high humidity levels conducive to mold growth.
  1. Water Stains or Dampness:
  • Visible water stains, dampness, or wet spots on carpets, seats, or the trunk lining can indicate a moisture problem that may lead to mold growth.

Addressing Hidden Mold

  1. Identify the Source:
    • Visual Inspection: Look for visible signs of mold, such as discoloration, spots, or stains on carpets, upholstery, and interior panels.
    • Smell Test: A musty odor is a strong indicator of mold. If your car smells moldy, investigate further to find the source.
  2. Deep Cleaning:
    • Remove and Clean Carpets and Mats: Take out all removable carpets and mats. Clean them thoroughly with a mold-killing solution.
    • Clean Upholstery: Use a steam cleaner or upholstery cleaner with anti-mold properties. Make sure the interior is thoroughly dried afterward.
    • Disinfect Hard Surfaces: Wipe down all hard surfaces, including the dashboard, door panels, and center console, with a mixture of water and white vinegar or a commercial mold cleaner.
  3. Professional Help:
    • Mold Remediation Specialists: If the mold problem is extensive or persistent, consider hiring a professional mold remediation service. They have the tools and expertise to address hidden mold effectively.
    • Automotive Detailing Services: Some detailing services specialize in mold removal and can provide a thorough cleaning of your car’s interior.

Preventive Measures to Mitigate Mold Risk

    Preventing Hidden Mold For Pets

  • Pet Covers and Mats: Use waterproof pet covers and mats to protect the car seats and floor from moisture and pet hair.
  • Regular Grooming: Keep your pets well-groomed to reduce the amount of hair and dander they shed in the car.
  • Dry Pets Before Entry: Dry your pets thoroughly with a towel after walks in the rain or swimming before allowing them back into the car.
  • Frequent Cleaning: Vacuum the car regularly to remove pet hair and dander. Use a pet hair remover tool for thorough cleaning.                 For Kids
  • Spill-Proof Containers: Use spill-proof cups and containers for snacks and drinks to minimize spills.
  • Clean Up Immediately: Clean up any spills or messes as soon as they occur to prevent moisture from seeping into the car’s fabrics.
  • Remove Wet Items: Ensure that wet clothing, shoes, and sports gear are not left in the car for extended periods.

  Maintenance Measures

  1. Regular Inspection and Cleaning:
  • Thorough Cleaning: Regularly clean and vacuum the car’s interior, paying special attention to areas under seats and carpets.
  • Check for Leaks: Inspect seals around windows, doors, and the sunroof for leaks. Repair any damaged seals promptly.
  • Apply Protective Coatings: Consider applying anti-mold coatings to carpets and upholstery as a preventive measure.
  1. Moisture Control:
  • Monitor for Moisture: Use moisture detectors to regularly check for hidden moisture in the car. Address any signs of moisture immediately.
    • Dehumidifiers: Use car dehumidifiers or moisture absorbers to keep humidity levels low.
    • Dry Wet Areas: Promptly dry any wet areas or spills to prevent moisture from accumulating.
  1. Ventilation:
    • Air Out the Car: Regularly ventilate the car by opening windows and doors, especially after driving in wet conditions or after cleaning.
    • Use the HVAC System: Use the HVAC system to circulate air and reduce humidity levels inside the car.
  1. Professional Help:
    • Mold Remediation Services: If you suspect hidden mold and cannot locate or remove it yourself, consider hiring professional mold remediation services. They have the tools and expertise to thoroughly clean and treat mold in all areas of the vehicle.

Conclusion

Hidden mold in a car can pose serious health risks and compromise the air quality inside the vehicle. Regular inspection, cleaning, and moisture control are essential to prevent mold growth. If you detect signs of hidden mold, such as musty odors or allergic reactions, taking prompt action to address the issue can help maintain a healthy and safe environment in your car.

Pets and kids can inadvertently contribute to hidden mold in cars by increasing moisture levels and introducing organic materials that mold can feed on. Regular cleaning, proper maintenance, and taking preventive measures can significantly reduce the risk of mold growth. Ensuring your car is clean and dry will help maintain a healthy environment for both your passengers and your vehicle.

11 Steps to Get Rid of Car Mold Safely

11 Steps to Get Rid of Car Mold Safely

Mold growth inside your car can be a persistent problem, especially in humid climates or after water damage. Not only is mold unsightly, but it can also pose health risks to you and your passengers. Fortunately, eliminating mold from your vehicle doesn’t have to be a daunting task. This guide outlines 11 essential steps to safely rid your car of mold while protecting both your health and your vehicle’s interior.

Nothing sours a morning commute like flipping on your car’s AC and being greeted by a musty, mildewy blast instead of fresh air. If you’ve noticed a persistent damp smell or seen unsightly spots creeping across your car’s interior, you’re facing a common yet serious problem: mold in cars. This fungal foe not only damages your vehicle’s aesthetics but poses real health risks, particularly for those with allergies or respiratory issues.

Every day, countless drivers unknowingly transport this hidden hazard, turning what should be a safe space into a health risk on wheels. If you’re among them, it’s crucial not just to remove the mold, but to understand why it’s there and how to stop it from coming back.

Read through our step-by-step guide and take the driver’s seat in combating car mold to ensure your ride is not just clean, but healthily pristine.

1. Identify the Problem

Mold in cars often goes unnoticed until it becomes a significant issue. Identifying the problem early can save you time and money.

Common signs of mold include:

  • Discoloration on surfaces
  • A persistent musty smell
  • Visible spots on seats, carpets, or other interior areas

Mold can appear in various colors, such as black, green, white, or orange, and might have a fuzzy or slimy texture.

The presence of mold in your vehicle isn’t just a minor inconvenience. It poses health risks, particularly for those with allergies, asthma, or weakened immune systems. Mold spores can cause respiratory problems, skin irritation, and other health issues.

Addressing mold quickly and effectively is crucial to ensure the safety and well-being of everyone who uses the car.

2. Gather Necessary Supplies

Before starting the mold removal process, gather all the necessary supplies. You’ll need protective gear like gloves, masks, and goggles to protect yourself from mold spores.

Essential cleaning supplies include:

  • White vinegar
  • Baking soda
  • A spray bottle
  • Microfiber cloths
  • A brush with stiff bristles
  • A vacuum cleaner with a HEPA filter

Protective gear is essential during vehicle mold removal to prevent inhalation of spores or skin contact. Mold spores can become airborne during the cleaning process which can pose a risk to your health. Wearing gloves, a mask, and goggles will help you avoid exposure and stay safe while tackling the mold problem.

3. Ventilate the Car

Proper ventilation is crucial when dealing with mold. Begin by opening all the car doors and windows to allow fresh air to circulate. If possible, park your car in a well-ventilated area, preferably outdoors.

This step helps to disperse mold spores and reduces the concentration of airborne particles.

Ventilating your car effectively involves creating a continuous flow of fresh air. You might consider using fans to enhance air circulation inside the vehicle.

This step not only helps in reducing mold spores but also aids in drying out the car and makes the subsequent cleaning steps more effective.

4. Remove Loose Items

Start by removing all loose items from your car, including floor mats, seat covers, and personal belongings. Mold can spread to these items, so it’s essential to clean or dispose of them properly.

Inspect each item for signs of mold. If you find mold on personal items, decide whether to clean them thoroughly or discard them to prevent re-contamination.

Clearing out the car interior also gives you a better view of the affected areas and allows you to assess the extent of the mold problem. By removing loose items, you ensure that you can clean every corner of your car more effectively.

5. Vacuum the Interior

Thoroughly vacuuming your car’s interior is a crucial step in removing mold spores. Use a vacuum cleaner equipped with a HEPA filter to ensure that you capture as many spores as possible. Focus on the seats, carpets, and any hard-to-reach areas where mold might be hiding.

Pay extra attention to the carpets and seats, as these are common places for mold growth. Use different attachments to get into crevices and under the seats.

Vacuuming not only removes visible mold but also helps in reducing the overall spore count which makes the subsequent cleaning steps more effective.

6. Clean with White Vinegar Solution

White vinegar is an effective, natural mold cleaner. Mix a solution of equal parts white vinegar and water in a spray bottle. Spray the solution generously on all mold-affected areas, including seats, carpets, and other interior surfaces. Allow the solution to sit for at least 15 minutes to penetrate the mold.

After the solution has had time to work, use a stiff-bristled brush to scrub the surfaces thoroughly. This helps to dislodge mold from deep within fabrics and crevices.

Wipe the surfaces with a microfiber cloth to remove the loosened mold and vinegar solution. Repeat this process as needed until all visible mold is gone.

7. Apply Baking Soda

Note: Make sure carpet is completely dry before performing this step.  Baking soda is a great natural deodorizer and moisture absorber. Sprinkle a generous amount of baking soda over the affected areas, especially on carpets and upholstery.

Allow the baking soda to sit for several hours or overnight. This step helps to absorb any remaining moisture and neutralize odors caused by the mold.

After the baking soda has had time to work, vacuum it up using your HEPA-filter vacuum cleaner. This step not only removes the baking soda but also any remaining mold spores to leave your car smelling fresh and clean.

8. Use an Antifungal Spray

For a more thorough clean, use an antifungal spray designed specifically for mold removal. Choose a product that is safe for use on car interiors and follow the manufacturer’s instructions.

Spray the antifungal solution on all affected areas, ensuring even coverage. The antifungal spray works to kill any remaining mold spores and prevent new mold growth.

Allow the solution to sit for the recommended time before wiping it off with a clean cloth. Using an antifungal spray adds an extra layer of protection and ensures that your car remains mold-free.

9. Dry the Car Thoroughly

Drying your car thoroughly is crucial to prevent mold from returning. Mold thrives in moist environments, so removing all moisture is essential.

Use fans or dehumidifiers to speed up the drying process. Open all doors and windows to enhance air circulation.

Focus on drying out the carpets, seats, and any other areas that may have been wet during the cleaning process. Use towels to blot any remaining moisture, and consider using a moisture meter to ensure that all areas are completely dry.

Thorough drying prevents future mold growth and keeps your car’s interior safe.

10. Inspect and Clean the Air Conditioning System

Keeping your car’s air conditioning system in top shape is essential for maintaining a mold-free environment. Start by inspecting and replacing the cabin air filter, a common hideout for mold spores. A fresh filter ensures cleaner air and less risk of mold recirculation.

Next, tackle the vents. Use a brush and an antifungal spray designed for use in automotive interiors to thoroughly clean each vent. This will remove any mold present and prevent spores from spreading.

For ongoing car interior care, regularly run your air conditioning on both cool and warm settings. This practice helps to dry out any residual moisture in the system and cuts down on the conditions that mold needs to grow.

It’s also wise to have a professional check your AC system annually. They can clean deeper components like the evaporator coil, which can be a breeding ground for mold if not properly maintained.

Implementing these car cleaning tips will not only improve your vehicle’s air quality but also enhance its overall cleanliness.

11. Prevent Future Mold Growth

Preventing mold in your vehicle is about maintaining a clean and dry environment. Regularly clean your car’s interior surfaces using car mold cleaning solutions that are specifically formulated to prevent mold growth.

Pay special attention to areas prone to moisture, such as floor mats and seats, which should be thoroughly dried if they become wet.

To further prevent car mold, ensure your vehicle is well-sealed. Check window seals and door gaskets regularly for any damage and replace them if they’re worn out. This keeps moisture from seeping into the car, a crucial step in mold prevention.

Another effective strategy is using moisture absorbers or dehumidifiers, especially if you live in a humid area. These tools can significantly reduce the dampness inside your car and create a less hospitable environment for mold.

Also, whenever possible, park your car in well-ventilated, sunny spots to help keep the interior dry and prevent mold.

Say Goodbye to Mold in Cars

Mold in cars is more than a mere inconvenience. It’s a silent aggressor against both your vehicle’s integrity and your health. Throughout this article, we’ve outlined a clear, step-by-step process to not only remove mold but ensure it doesn’t come back.

At Lonadier’s Mobile Detailing, we specialize in transforming your car into a pristine, safe haven free from mold and its spores. Our expertise in car mold remediation, backed by over a decade of dedicated service and stellar customer reviews, makes us your best ally in combating vehicle mold.

Don’t let mold take the driver’s seat. Contact us today and breathe new life into your ride.


What You Need to Know About the Air Quality Index in Your Car!

What You Need to Know About the Air Quality Index in Your Car!

Maintaining good air quality in your car is essential for the health and comfort of occupants. The air quality index (AQI) in cars can be influenced by various factors, including pollutants, allergens, and mold. Here’s what you need to know about monitoring and improving air quality in your car:


Factors Affecting Air Quality in Cars

  1. External Pollutants:
    • Traffic Emissions: Exhaust fumes from other vehicles can enter your car, especially in heavy traffic.
    • Industrial Pollution: Driving near factories or industrial areas can expose you to higher levels of pollutants.
    • Pollen and Allergens: Seasonal changes can increase the presence of pollen and other allergens inside the car.

2.  Internal Pollutants:

  • Mold and Mildew: Moisture buildup from leaks or condensation can lead to mold growth inside the car.
  • Dust and Particles: Accumulation of dust, pet dander, and other particles can degrade air quality.
  • Volatile Organic Compounds (VOCs): These can be emitted from car interior materials like upholstery, plastics, and cleaning products.


Monitoring Air Quality in Cars

To monitor the air quality inside your car, consider using the following tools:

  1. Portable Air Quality Monitors:
    • Devices that measure levels of pollutants like particulate matter (PM2.5 and PM10), carbon dioxide (CO2), volatile organic compounds (VOCs), and more.
    • These monitors can provide real-time data on air quality and alert you to hazardous levels of pollutants.
  2. Built-in Air Quality Sensors:
    • Some modern vehicles come equipped with built-in air quality sensors that monitor and display air quality levels.
    • These systems often work in conjunction with advanced air filtration systems to maintain good air quality automatically.

How AQI is Determined

The Air Quality Index (AQI) is a numerical scale used to communicate how polluted the air currently is or how polluted it is forecast to become. The AQI incorporates multiple air pollutants and provides a single value to represent overall air quality. The specific pollutants considered in the AQI can vary by country, but commonly included pollutants are:


  1. Ground-level ozone (O3)
  2. Particulate matter (PM10 and PM2.5)
  3. Carbon monoxide (CO)
  4. Sulfur dioxide (SO2)
  5. Nitrogen dioxide (NO2)


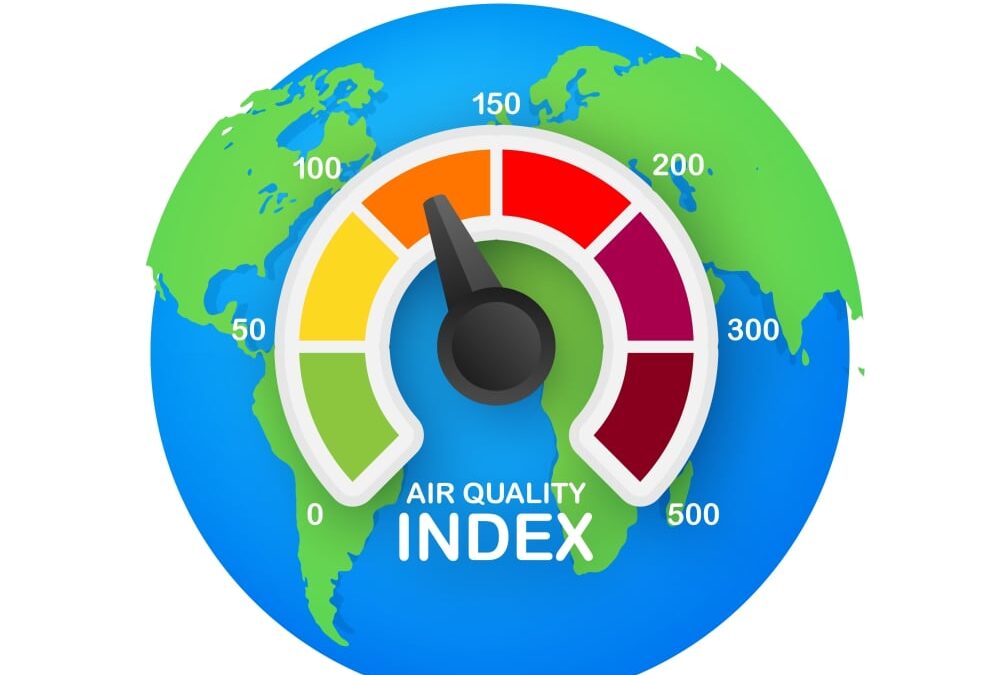
The AQI is calculated based on the concentration levels of these pollutants. Each pollutant is assigned an individual index value, and the highest of these values is used as the overall AQI for a specific location and time. The AQI is typically reported on a scale from 0 to 500, where higher values indicate poorer air quality.

The general steps for calculating the AQI are as follows:


  1. Measure pollutant concentrations:The concentrations of each relevant pollutant are measured at various monitoring stations.
  2. Determine sub-index values:Each pollutant’s concentration is converted into a sub-index value using a specific formula. These formulas are often nonlinear and are designed to reflect the known health effects of each pollutant.
  3. Choose the highest sub-index:The highest sub-index value among all pollutants is selected as the overall AQI for that location and time.
  4. Interpret the AQI:The AQI is divided into categories or color-coded ranges that correspond to different levels of health concern. These categories typically range from “Good” to “Hazardous,” providing a quick indication of the potential health risks associated with the current air quality.

Air Quality Index ratings:

The Air Quality Index (AQI) is a numerical scale used to communicate the quality of the air to the public. It is measured by assessing the levels of specific air pollutants in the atmosphere, such as ground-level ozone, particulate matter, carbon monoxide, sulfur dioxide, and nitrogen dioxide. The AQI scale typically ranges from 0 to 500, with higher values indicating worse air quality.

To measure the AQI, monitoring stations collect data on these pollutant levels, usually on an hourly basis. The concentration of each pollutant is then converted to an individual AQI value using a standardized formula, which takes into account the pollutant’s health effects at various concentrations. The highest individual AQI value among the pollutants measured at a given location becomes the overall AQI for that area.

Six Categories of Air Quality

The AQI is divided into six color-coded categories, each representing a different level of health concern:

Good (0-50): Air quality is considered satisfactory, and air pollution poses little or no risk.

Moderate (51-100): Air quality is acceptable; however, there may be a moderate health concern for a very small number of people who are unusually sensitive to air pollution.

Unhealthy for Sensitive Groups (101-150): Members of sensitive groups, such as children, older adults, and people with respiratory or heart issues, may experience health effects. The general public is not likely to be affected.

Unhealthy (151-200): Everyone may begin to experience health effects, and members of sensitive groups may experience more serious health effects.

Very Unhealthy (201-300): Health alert, meaning everyone may experience more serious health effects.

Hazardous (301-500): Health warnings of emergency conditions, as the entire population is more likely to be affected.

It’s important to note that different countries may use different AQI systems with variations in the pollutants considered, concentration ranges, and health categories. The AQI is a useful tool for informing the public about air quality and helping individuals take appropriate actions to reduce exposure when air quality is poor.


Improving Air Quality in Cars

Here are some steps to improve and maintain good air quality in your car:

Improving the air quality index (AQI) in your car involves a combination of measures to reduce the intake of external pollutants, control internal sources of contamination, and maintain a clean and well-ventilated environment. Here are some effective strategies to improve AQI in your car:

1. Use High-Quality Air Filters

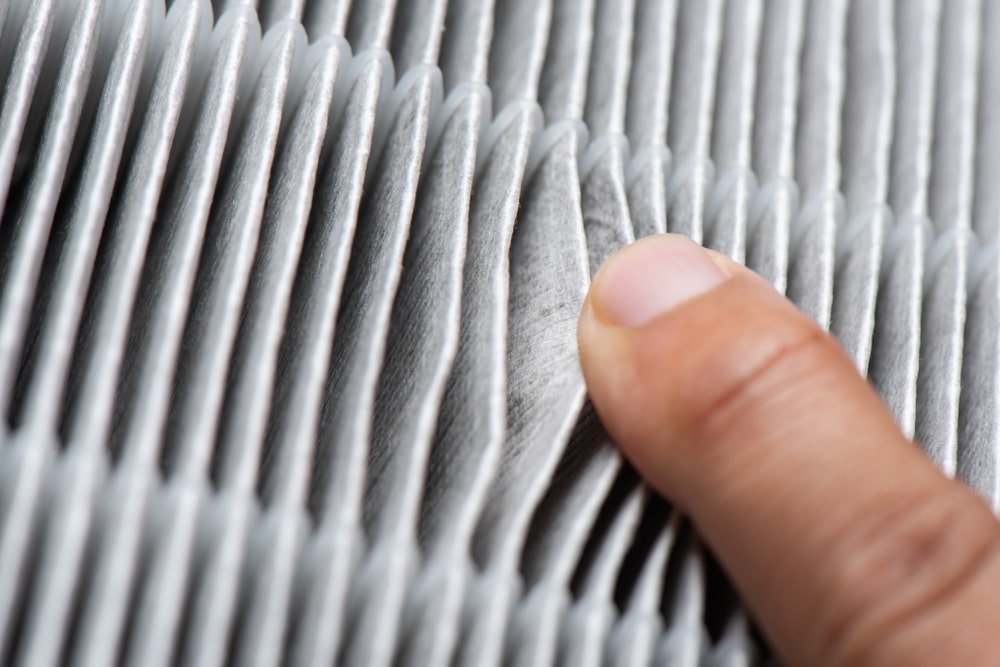
  • Cabin Air Filters: Install and regularly replace the cabin air filter with a high-efficiency particulate air (HEPA) filter. HEPA filters are capable of trapping fine particles, including dust, pollen, and other allergens.
  • Regular Maintenance: Follow the manufacturer’s recommendations for changing the filter, typically every 12,000 to 15,000 miles, or more frequently if you drive in high-pollution areas.

2. Improve Ventilation

  • Use Recirculation Mode Wisely: Use the recirculation mode in heavy traffic or polluted areas to minimize the intake of outdoor pollutants. However, periodically switch to fresh air intake to avoid CO2 buildup and to bring in fresh air.
  • Fresh Air Intake: When driving in areas with good air quality, use the fresh air intake to allow proper ventilation and reduce indoor pollutant levels.

3. Control Moisture and Prevent Mold

  • Fix Leaks: Address any leaks in your car to prevent moisture buildup, which can lead to mold growth.
  • Use Dehumidifiers: Consider using car dehumidifiers or moisture-absorbing products, especially in humid climates, to control humidity levels inside the car.
  • Dry Wet Areas: Promptly dry any wet areas, such as carpets and seats, to prevent mold and mildew.

4. Keep the Interior Clean

  • Regular Cleaning: Vacuum and clean the car interior regularly to remove dust, dirt, pet dander, and other allergens.
  • Avoid Harsh Chemicals: Use low-VOC or natural cleaning products to reduce the emission of volatile organic compounds (VOCs).

5. Use Air Purifiers

  • Portable Air Purifiers: Use portable air purifiers designed for cars to filter out pollutants and improve air quality. Look for purifiers with HEPA filters and activated carbon filters.
  • Ionizers: Some car air purifiers come with ionizers that can help reduce airborne particles.

6. Monitor Air Quality

  • Air Quality Monitors: Use portable air quality monitors to measure levels of pollutants like particulate matter (PM2.5 and PM10), VOCs, and CO2. This can help you understand the air quality inside your car and take appropriate actions.
  • Built-in Sensors: If your car has built-in air quality sensors, monitor the display and adjust ventilation settings as needed.

7. Avoid Pollutant Sources

  • No Smoking: Avoid smoking inside the car, as it significantly degrades air quality and leaves harmful residues.
  • Limit Idling: Reduce idling time, especially in enclosed spaces like garages, to minimize the buildup of exhaust fumes inside the car.

8. Maintain HVAC System

  • Regular Service: Ensure that your car’s HVAC system is regularly serviced and cleaned to maintain optimal performance and air quality.
  • Clean Ducts: Consider having the air ducts cleaned periodically to remove any dust, mold, or debris buildup.

9. Improve Driving Habits

  • Windows Up: Keep windows up when driving in high-pollution areas or during pollen season to reduce the intake of external pollutants.
  • Avoid High Traffic Areas: Whenever possible, avoid driving in heavy traffic or industrial areas where pollutant levels are higher.

By implementing these strategies, you can significantly improve the air quality inside your car, providing a healthier and more comfortable environment for you and your passengers. Regular maintenance, proper ventilation, and the use of high-quality filters and purifiers are key to achieving and maintaining good AQI in your vehicle.

Maintaining good air quality in your car involves monitoring for pollutants, using high-quality air filters, controlling moisture, and keeping the interior clean. By taking these steps, you can ensure a healthier and more comfortable environment for you and your passengers.

What to Avoid to Maintain a Healthy AQI

To maintain a healthy air quality index (AQI) in your car, it’s important to avoid certain practices and conditions that can deteriorate the air quality. Here are key things to avoid:

1. Smoking Inside the Car

  • Avoid Smoking: Smoking in the car releases harmful chemicals, particulate matter, and carcinogens, which can significantly degrade air quality and leave residues that are hard to remove.

2. Using Harsh Chemical Cleaners

  • Avoid Harsh Chemicals: Cleaning products with strong chemicals and volatile organic compounds (VOCs) can release harmful fumes. Instead, use low-VOC or natural cleaning products.

3. Allowing Moisture Build-Up

  • Avoid Moisture Accumulation: Moisture can lead to mold and mildew growth, which can release spores and degrade air quality. Ensure leaks are repaired, and wet items are promptly dried.
  • Don’t Ignore Leaks: Address any leaks from windows, sunroofs, or the HVAC system immediately.

4. Ignoring Air Filter Maintenance

  • Avoid Neglecting Filters: Failing to replace or clean the cabin air filter regularly can reduce its effectiveness in trapping dust, pollen, and other pollutants.
  • Use Low-Quality Filters: Invest in high-quality HEPA filters rather than cheaper, less effective ones.

5. Poor Ventilation Practices

  • Avoid Constant Recirculation Mode: While recirculation mode can be useful in high-traffic areas, using it constantly can lead to increased levels of CO2 and reduced oxygen levels inside the car.
  • Don’t Overlook Fresh Air Intake: Occasionally use the fresh air intake mode to allow ventilation and reduce indoor pollutant levels.

6. Ignoring Regular Cleaning

  • Avoid Neglecting Cleaning: Accumulation of dust, dirt, and pet dander can affect air quality. Regularly vacuum and clean the car’s interior, including hard-to-reach areas.
  • Skip Detailed Cleaning: Pay attention to cleaning not just visible surfaces but also areas like under the seats and in the HVAC ducts.

7. Leaving Food and Trash Inside

  • Avoid Leaving Food and Trash: Food crumbs and trash can attract pests and lead to the growth of bacteria and mold. Regularly remove all trash and avoid eating inside the car when possible.

8. Using Air Fresheners with Strong Chemicals

  • Avoid Chemical Air Fresheners: Many air fresheners contain chemicals that can emit VOCs. Opt for natural air fresheners or essential oil diffusers instead.

9. Driving with Windows Open in Polluted Areas

  • Avoid Open Windows in High Traffic: Keep windows closed in high-traffic or industrial areas to prevent outdoor pollutants from entering the car.
  • Use A/C Wisely: Use the air conditioning system with the appropriate settings to maintain good air quality without pulling in excessive pollutants.

10. Ignoring HVAC System Maintenance

  • Avoid Skipping HVAC Maintenance: Regularly service the car’s HVAC system to ensure it’s clean and functioning efficiently. This includes cleaning or replacing air ducts and ensuring there’s no mold or debris buildup.

By avoiding these practices and maintaining proper car care and hygiene, you can significantly improve and maintain a healthy AQI inside your vehicle. Regular maintenance, conscious use of ventilation settings, and attention to cleaning and filter replacement are key factors in ensuring good air quality for a safe and comfortable driving environment.


MERV vs. HEPA: How Air Filters Work

MERV vs. HEPA: How Air Filters Work

When it comes to air filters, understanding the differences between MERV (Minimum Efficiency Reporting Value) and HEPA (High-Efficiency Particulate Air) filters is essential for making an informed choice. Both types of filters have their unique characteristics, applications, and efficiencies. Here’s a detailed comparison:

MERV FILTERS

What is MERV?

  • MERV Rating System: The MERV rating system ranges from 1 to 16 and measures a filter’s ability to capture particles of varying sizes, from 0.3 to 10 microns.
  • Common Applications: Used in HVAC systems in residential, commercial, and industrial settings.

How MERV Filters Work

  • Filter Material: Made from pleated fabric or other materials designed to capture particles.
  • Efficiency: The higher the MERV rating, the more efficient the filter is at capturing smaller particles.
    • MERV 1-4: Basic filtration, captures large particles like dust and pollen.
    • MERV 5-8: Intermediate filtration, captures smaller particles like mold spores.
    • MERV 9-12: Higher efficiency, captures fine particles like lead dust and vehicle emissions.
    • MERV 13-16: Highest efficiency for MERV filters, captures very fine particles like bacteria, mold, and smoke.

Advantages of MERV Filters

  • Versatility: Suitable for a wide range of applications.
  • Scalability: Available in various efficiencies to match specific needs and budgets.
  • Affordability: Generally more affordable than HEPA filters.

Limitations of MERV Filters

  • Efficiency Cap: Even the highest MERV ratings (13-16) do not match HEPA’s efficiency.
  • Airflow Resistance: Higher MERV ratings can increase resistance to airflow, which may affect HVAC system performance if not properly sized.

HEPA FILTERS

What is HEPA?

  • HEPA Standard: HEPA filters must capture at least 99.97% of particles as small as 0.3 microns.
  • Common Applications: Used in environments requiring very high air purity, such as hospitals, clean rooms, and high-end consumer products like air purifiers and vacuum cleaners.

How HEPA Filters Work

  • Filter Material: Composed of a dense mat of fibers arranged to trap particles through diffusion, interception, and impaction.
  • Efficiency: Exceptionally high at capturing very fine particles, including pollen, mold spores, dust mites, bacteria, and some viruses.

Advantages of HEPA Filters

  • High Efficiency: Provides superior air filtration, removing the majority of airborne contaminants.
  • Health Benefits: Ideal for people with allergies, asthma, or other respiratory conditions due to its ability to capture very small particles.
  • Reliability: Proven effectiveness in critical applications.

Limitations of HEPA Filters

  • Cost: More expensive than most MERV filters.
  • Airflow Resistance: Can significantly impede airflow if the HVAC system is not designed to handle the increased resistance.
  • Maintenance: Requires regular maintenance and replacement to maintain efficiency.

Comparison Summary

Feature MERV Filters HEPA Filters
Efficiency Range MERV 1-16 (varies by particle size) 99.97% efficiency for particles ≥0.3 microns
Applications Residential, commercial, industrial HVAC Hospitals, clean rooms, air purifiers
Cost Generally more affordable More expensive
Airflow Resistance Varies by MERV rating (higher ratings more resistant) High resistance, requires compatible systems
Maintenance Regular replacement needed, less frequent Regular replacement needed, more frequent
Health Benefits Good for general air quality improvement Excellent for allergy and asthma sufferers

Conclusion

Choosing between MERV and HEPA filters depends on your specific needs:

  • For General Use: MERV filters are versatile, cost-effective, and come in a range of efficiencies suitable for most residential and commercial HVAC systems.
  • For High Air Quality Needs: HEPA filters are the best choice for environments requiring the highest level of air purification, such as healthcare settings and homes with individuals with severe allergies or respiratory conditions.

Understanding these differences helps ensure you select the right filter to meet your air quality needs and maintain a healthy environment.


Does the color of mold determine if it’s dangerous?

Does the color of mold determine if it’s dangerous?

Does the color of mold determine if it’s dangerous?

Mold colors can be quite diverse, but unfortunately, they don’t reliably indicate the specific type of mold. While it’s tempting to associate certain colors with particular molds, the truth is that mold identification is more complex. Here’s why:

  1. Color Variability:
    • Molds come in various shapes, sizes, and colors.
    • A single patch of mold can exhibit multiple colors or even change color over time due to factors like food sourcehumidity, and light exposure.
  2. Identifying Mold:
    • Laboratory analysis is the most accurate way to identify mold species.
    • Experts examine the structurespores, and growth morphology under a microscope.
    • Color alone isn’t a reliable distinguishing characteristic.
  3. Common Mold Colors:
    • Green: The most common mold color. It can represent various molds, including AspergillusPenicillium, and Cladosporium.
    • Black: Infamous for toxic black mold, but not all black molds are toxic. Stachybotrys chartarum is the dangerous one, producing mycotoxins.
    • Alternaria: Another black-colored mold, less dangerous than Stachybotrys. It usually grows outdoors but can be found indoors.
    • Aspergillus: A common fungus that you likely breathe in daily12.
  4. Health Risks:

Mold and moisture

Mold and moisture

Mold and moisture:

Mold and moisture are closely related, as moisture is a key factor in the growth of mold. Here are some important points about mold and moisture, including prevention, health effects, and remediation:

Causes of Mold Growth

  1. Moisture Sources: Leaks, condensation, humidity, and flooding are primary sources.
  2. Temperature: Mold thrives in warm, damp environments.
  3. Organic Materials: Mold grows on materials like wood, paper, carpet, and food.

Health Effects of Mold

  1. Allergic Reactions: Symptoms include sneezing, runny nose, red eyes, and skin rash.
  2. Respiratory Issues: Mold exposure can cause asthma attacks and respiratory infections.
  3. Toxic Mold: Some molds, like Stachybotrys chartarum (black mold), produce mycotoxins that can cause severe health problems.

Prevention of Mold Growth

  1. Control Humidity: Keep interior humidity below 60%, ideally between 30-50%.
  2. Ventilation: Ensure proper ventilation in areas prone to moisture.
  3. Repair Leaks: Fix leaks.
  4. Dry Wet Areas: Dry areas within 24-48 hours after a spill or leak.

Detecting Mold

  1. Visual Inspection: Look for visible signs of mold growth.
  2. Odor: Musty smell is often an indicator of mold.
  3. Professional Testing: If mold is suspected but not visible, professional testing can confirm its presence.

Remediation of Mold

  1. All Areas: Clean areas of mold with hydrogen peroxide or other common remediation chemicals
  2. Protective Gear: Use protective gear like gloves, masks, and goggles when cleaning mold.
  3. Remove Contaminated Materials: Remove all items from all compartments including glove box, trunk, center console, etc.

Steps for Mold Cleanup

  1. Identify Source: Determine and eliminate the source of moisture.
  2. Remove Mold: Clean or remove moldy materials.
  3. Dry Area Thoroughly: Use fans and dehumidifiers to dry the area.
  4. Prevent Future Growth: Apply mold inhibitors and ensure proper ventilation and humidity control.

Tips for Maintaining a Mold-Free Environment

  1. Regular Maintenance: Keep tree debris off of car.  Regularly clean trunk gutters and cowl area.
  2. Monitor Humidity: If car is parked for an extended period, use hygrometers or a moisture meter to check humidity levels. Consider putting in damprid or even a small dehumidifier in vehicle to keep humidity below 60%.

By understanding the relationship between mold and moisture and taking proactive measures to control moisture levels, you can effectively prevent mold growth and protect your health and property.